SHIRO DASHI TUNA AND EGG SALAD

I have been away from my blog for a long time. We have been doing a lot of traveling, grandchild visiting and not much cooking, but frankly, I had run out  of new things to write about – especially recipes. However, on our most recent visit, Sarah introduced us to a condiment that I had never knowingly tried. It is a secret ingredient at Rich Table and RT Rotisserie, although it appears in the Rich Table cookbook. Sarah calls it shiro dashi vinaigrette, and she makes enough at one time to keep in the refrigerator to season salads, noodles, and whatever needs some added flavor. Shiro dashi adds the umami that the Japanese are so good at incorporating into their foods. Shiro dashi is actually a concentrated soup and sauce base. It may be available in your local large grocery stores, especially those with a section for Asian foods. In our vicinity we are fortunate to have Asian, Japanese, Korean, Thai, Persian, Chinese, etc. supermarkets, so it is easy to find unusual ingredients. I found a bottle at the Korean market. The recipe for the vinaigrette is simple, so I have followed Sarah’s lead and keep a jar made up and in the refrigerator.

Now, on to tuna and egg salad. Who needs a recipe for that? I have made it for years beginning when I was a teenage short-order cook. The version at that café was homogenized so finely that it looked like – well, let’s just say it was not appetizing. BUT it kept well for a week on the shelf in the walk-in. To my way of thinking, in a well-prepared tuna salad the canned tuna should be in identifiable chunks as should the egg. (Fresh tuna salad is another story with its own guidelines for preparation.) There also must be chopped celery and scallions – again, identifiable. Then there needs to be something sour. I like chopped salad olives because the pimentos add color, but chopped dill pickles or capers also work. If you have other favorites, add them. Some folks add chopped nuts and/or apples. I am not a fan of those, but if you like them, add them, or whatever else pleases your taste.

Finally, there is the choice of dressing. The standard is bottled mayonnaise, but usually there is way too much, and before long it turns soupy. Homemade mayonnaise is delicious, but too much trouble for the little amount that you use. I prefer just enough French vinaigrette to moisten the mix. It brings great flavor and is light. That made it easy to take the next step and give shiro dashi vinaigrette a try. I am glad. In the future, I won’t use anything else.

You can complete things with a sandwich: your best bread, a leaf of crisp lettuce, a slice or two of fresh tomato, and some avocado. If you decide to go full steam, moisten the bread with shiro dashi vinaigrette instead of butter or mayonnaise. The perfect lunch.

RECIPES

Shiro Dashi Vinaigrette

Ingredients

  •  ½ cup freshly squeezed lemon juice (2 large lemons should work)
  •  1/3 cup extra virgin olive oil
  • 1½ tablespoons shiro dashi
  • 1 tablespoon finely chopped shallot
  • salt to taste

Method

  1. Put all the ingredients in a quart Mason jar. Cover tightly and shake vigorously until will mixed.
  2. Use as you would vinaigrette. Refrigerate leftovers for up to 1 week. Use on any dish that would benefit from some flavor – salads, soups, cooked vegetables, etc.

Shiro Dashi Tuna and Egg Salad

Ingredients

  • 1 can tuna (7 ounces), well drained
  • 3 hard-boiled eggs, chopped coarsely
  • 3 scallions, green part included, sliced finely
  • 1 stalk celery, chopped into 1/8-1/4 inch pieces
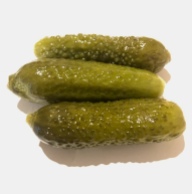
  • 3 small dilll pickles, chopped
  • 3 to 6 generous tablespoons shiro dashi vinaigrette, according to taste
  • salt and pepper

Method

  1. In a medium bowl, mash together the tuna and eggs, using a table fork, until they are well broken up but still recognizable. Gently stir in the sliced scallions, chopped celery, and chopped pickles.
  2. Add shiro dashi just to moisten the mixture and according to your taste.
  3. Adjust salt and pepper to taste. Serve.

5 Comments

Filed under Food, Photography, Recipes

ASPARAGUS SOUP AND SPAGHETTI WITH PEAS

This last weekend turned out to be a good family gathering. Sarah drove from San Francisco with her two boys. We spent the days enjoying some of the attractions of Southern California even though it was cold and overcast. Sarah was disappointed that Bay Area weather followed her. The boys swam – shivering – in the unheated pool. There were walks along the seaside cliffs and among the yellow waves of flowering mustard. Everyone is on a diet. Mine is medically prescribed, Carol’s is more casual, and Sarah’s is a crash strict vegetarian regimen. For a few hours we were fairly conscientious. Our first evening’s meal was a green salad with shredded rotisserie chicken and various vegetable additions. Dessert was fruit salad, actually a mixed fruit and berry compote. On that I gained two pounds! What???

Dying eggs, filling Easter baskets, and trying out an antique Easter bunny chocolate mold that Sarah found in Petaluma were all subliminal messages to relax our diet ambitions…and so we did.

After dress-up church, Carol came home for a brief walk before she launched into preparation of a delicious feast that set back my weight-loss ambitions by several days. We enjoyed a Southern California evening with drinks and snacks on the patio. The weather had a change of heart that made it possible.. Then Carol began the cavalcade of food with tiny glass cups of chilled creamed asparagus soup topped off with a dollop of lemon cream and a bit of asparagus tip.  We sipped the delicious amuse bouche and watched for the green light as the sun dipped below the ocean horizon. As always, we did not see it.

Carol often makes a chilled mushroom soup that she serves as a first course, but because it’s spring and Easter, and because it is high season for asparagus, she changed her menu. The lemon cream was a good foil for the vegetal soup. In preparing the soup, the final step is to puree the soup mixture. Just be aware that a regular blender will not work. Carol used a Vita-Mix for several minutes to get the velvety texture. I guess you could also pass the mixture through a tamis, but that sounds like a lot of work to me.

Chilled asparagus soup with lemon cream

At Carol’s request, Sarah made “Spaghetti with Peas, Lime, Goat Cheese and Duck Fat” from Rich Table, pages 129-131. The dish was a popular favorite when the restaurant first opened. It has been off the menu for a while, but it is featured in the cookbook. Sarah brought her own supply of fresh green peas and pea tendrils from San Francisco, but I am sure that Los Angeles peas would have worked. You can probably find your own pea tendrils in a little plastic clamshell at a store like Whole Foods. Who would think that green peas and spaghetti are a delicious combination? Clearly, goat cheese and duck fat contribute to  the rush of flavors, but the finished product is both beautiful and delicious.

Sarah heads to New York City after her visit here for the James Beard writing awards. The cookbook is a finalist for best cookbook in the restaurant and professional category. Good luck, Sarah.

Spaghetti with peas, lime, goat cheese, and duck fat

Add to that  a beautiful glazed Japanese-style ham with honey-glazed carrots and hard rolls and the feast was complete…

EXCEPT

You can’t have a feast like that without dessert. And so Carol made a three-layer spice cake filled with berries, topped with cream cheese frosting along with fresh blackberries. Ice cream on request. So long to any last remnants of a diet.

Spice cake with mixed fresh berries

But there’s always Monday.

3 Comments

Filed under Recipes

CORNED BEEF HASH SHAKSHUKA STYLE

Carol hosted our family dinner on the Sunday of Saint Patrick’s Day. The day is always cause for celebration because Irish roots in our family are deep. Carol’s husband’s family boasts an Irish surname and all of them have Irish first names. Everyone is a strong (And I do mean strong) alum of Notre Dame. The patriarch insists on speaking Gaelic whenever he has the opportunity. He often delivers Gaelic prayers at family gatherings. On the other hand, Susan’s family also has a strong Irish background, but I think most of them wear orange underwear. There is a rule that Irish politics are never discussed at family dinners, but the food is always Irish in origin. Carol made an elaborate dinner including shepherd’s pie (with lamb, of course), corned beef, and boiled new potatoes along with rice pudding. There were two loaves of Irish soda bread which disappeared straight away. Things started off with a cheese plate containing several Irish cheeses and a wedge of Welsh Cheddar. That served to mollify the odd man out – me – who has Welsh and German origins. I am pleased to report that in a blind tasting, the Welsh Cheddar won out over an Irish Cheddar. After the dinner, Carol sent us home with leftovers including the corned beef and boiled new potatoes.

Susan says that her favorite use of corned beef is in sandwiches, so of course our first meal was corned beef sandwiches. But we still had enough meat left over that we came up with another dinner. Corned beef hash is obvious and also a good way to use the boiled potatoes. I chopped up the corned beef and potatoes, along with an onion and fried them up like any good hash with the plan to top it with eggs. Somehow, though, it looked monochromatic. Ketchup is my usual condiment of choice, but this hash needed more. So I mixed up an impromptu tomato sauce and layered it between the eggs before I  popped it in the oven. The result was sort of a combination hash and shakshuka, but whatever, it made a good leftovers meal.

RECIPE

Corned Beef Hash Shakshuka Style

Ingredients

  • 6 ounces (more or less) corned beef
  • 2 cups (more or less) boiled new potatoes
  • 1 large onion
  • 3 tablespoons unsalted butter
  • 1 small can (8 ounces) tomato sauce
  • 4 cremini mushrooms, sliced
  • ¼ cup manzanilla salad olives, chopped coarsely
  • 1 clove garlic, minced
  • 1 tablespoon freshly grated ginger
  • salt and pepper
  • 4 ounces mozzarella cheese, grated
  • 4 large eggs, room temperature
  • 1 tablespoon Italian seasoning herb mixture

Method

  1. Chop the beef, potatoes, and onion coarsely. Melt the butter in a medium saucepan over medium heat. Add the beef, potatoes, and onion.  Sauté until the potatoes begin to crisp and the onion is wilted and tender, about 15 minutes. Transfer the mixture to a greased  8 x 8 inch glass baking pan, leveling the hash. Form four deep indentations in the mixture using a serving spoon. Set aside until ready to assemble.
  2. In a small bowl, combine the tomato sauce, mushrooms, olives, garlic and ginger. Adjust seasoning with salt and pepper.
  3. When ready to assemble, sprinkle one-fourth of the grated mozzarella into each of the four indentations in the hash. Break an egg into each of the indentations. Pour the sauce onto the hash around the eggs. Sprinkle the herb mixture over the entire dish.
  4. Bake in the middle of an oven preheated to 350°F for about 15 minutes until the whites of the eggs are set and the yolks are still runny. (As you can see, I left them in the oven a little too long) Watch carefully and remove from the oven when the eggs are cooked to your liking. Serve immediately.

4 Comments

Filed under Food, Photography, Recipes

THE OSCARS – I DIDN’T WIN

Well, the Oscars show is over and I didn’t win. That is, I didn’t win the annual family contest of picking the winners. As I mentioned in my previous post, I thought that my granddaughter would not be participating. That would give me a chance. How wrong I was. She had emailed her choices ahead of time and kept in touch during the ceremony. The stakes were higher this year, as my son-in-law had purchased a trophy for the winner along with a $20 gift card.  In the end, the results were the same as the last two years: my granddaughter won and Susan came in second, this time tied with my son-in-law. It is clear that I have no future as a movie critic.

In the meantime, the food was great. Delicious sliders with all the fixings  – definitely not Harold and Kumar’s White Castle (A nod to a family joke). There were also Carol’s popular mushroom soup, shrimp and dipping sauce, crudités with dip, cheese straws, Texas trash, and brownies with whipped cream along with marinated mushrooms at Carol’s request.

Diane’s marinated mushrooms is a recipe from our family cookbook. We got it from Diane Miller, the wife of the first associate I ever hired, back in 1977. The recipe has been a favorite with the whole family, especially Carol whose first word – after Mama and Dada, of course – was “muf-woom” to indicate that a mushroom was what she wanted to eat. The recipe calls for button mushrooms, but if you can only find large ones, you can cut them into halves or quarters. The mushrooms shrink with boiling and marinating.

RECIPE

Diane’s Marinated Mushrooms

Ingredients

  •  1½ pounds white button mushrooms (creminis work just fine)
  • 2 quarts water
  • 1 tablespoon lemon juice
  • 1 cup apple cider vinegar (You can use wine vinegar if you prefer)
  • ½ cup extra virgin olive oil
  • 1 tablespoon salt
  • 1½ teaspoon sugar
  • bay leaf
  • ½ teaspoon ground black pepper
  • several whole peppercorns
  • 1 tablespoon pickling spice
  • 2 cloves garlic, minced

Method

  1. Prepare the mushrooms by wiping off the caps and, if necessary, cutting into halves or quarters. Bring the water to the boil, add the lemon juice and then the mushrooms. Return to the boil for 3 minutes. Drain and cool the mushrooms.
  2. Meanwhile, prepare the marinade by combining all the remaining ingredients.
  3. Add the boiled mushrooms to the marinade. Marinate for 24 hours, stirring occasionally.
  4. Drain. Serve at room temperature with picks. Makes about 2 cups, enough for 6 to 8 persons as an appetizer with drinks.

5 Comments

Filed under Food, Photography, Recipes

TIME FOR THE OSCARS, TIME FOR TEXAS TRASH

After two years, I have clearly adopted some of the behaviors and activities of Angelinos. One of those is a fascination with Hollywood. Well, not really, but I do pay more attention to the movies  and have returned to watching the Oscars after a decades-long absence. A major reason for that is our family. On Oscar night, our regular  Sunday family dinner has been supplanted by our gathering in front of the television. Dinner is finger food on a buffet so that you can replenish your plate during commercial breaks. My son-in-law in his professional life is a serious, no-nonsense, take-charge kind of guy. Around home he is quiet and considerate and also an expert on contemporary music and movies. He knows the names of all the actors, even the walk-ons, and usually knows some interesting tidbit about them. Same is true of current bands and singers. For that reason he is in charge of organizing Oscar Night. (They might want to consider him for the job of organizing the real Oscar show.) He makes ballots so that each family member can indicate his or her choice for the winner. There is excitement throughout the evening with the uncertainty of who will make the most correct picks. It is usually a tight race between my granddaughter and Susan. My granddaughter is also a movie aficionado so it is expected that she will do well. But the surprise is Susan who has no interest in the movies and is still able to pick the winners. This year, Susan may have the field to herself as my granddaughter is off to college. Her prize for winning will be that she has bested all the others in this very competitive family.

Meanwhile, Carol is in charge of the food. Trust me, there is just as much competitive pressure to deliver on the food as there is to win the Oscar picks. She will probably make sliders, her famous pinwheels, and maybe her elegant cheese puff pastry. She asked me to make cheese straws and brownies. Both are long-time family favorites. I decided to make some Texas Trash as well. This is another family favorite, and it lends itself to noshing in front of the TV. The recipe is SIMPLE. You can also find a similar recipe on any box of Chex cereal. These days you can also find it ready made, but like most things it’s not as good as homemade. The recipe makes about 10 cups, which should be enough for the five of us, but I expect that it will be gone at the end of the Oscars.

Who do you think will win the Oscars?

RECIPE

Texas Trash

Ingredients

  • ½ cup (one stick) butter, melted
  • 2 tablespoons Worcestershire sauce
  • 2 teaspoons seasoned salt
  • 2 cups Wheat Chex
  • 2 cups Corn Chex
  • 2 cups Rice Chex
  • 1 cup mixed nuts
  • 1 cup mini pretzels

Method

  1. Place the melted butter in a very large mixing bowl. Add the Worcestershire sauce and the seasoned salt, stirring to make sure they are well combined.
  2. Stir in the three cereals, stirring gently to make sure the butter mixture is evenly distributed and completely absorbed.
  3. Add the nuts and pretzels.  Stir to combine and transfer to a large rimmed baking pan.
  4. Bake for 1 hour in the middle of the oven preheated to 250° F , stirring every 15 minutes to make sure the mixture is evenly coated.
  5. Remove from the oven and cool. Serve immediately or store in an air-tight container.

Cook’s note: This is not like baking a soufflé, so measurements are not precise. The ingredient list is also variable. If you want to add or substitute peanuts or different pretzels or bagel chips, do it. If you want more flavoring like chile powder or dry ranch dressing mix, add it. Whatever you do will probably taste good, and the Texas Trash will be gone before you know it.


4 Comments

Filed under Food, Photography, Recipes

POPCORN

I love popcorn. So does nearly everyone in the family. I grew up on popcorn. It was cheap and found in many places: the dime store always had the popper going with steam pouring out of the doors and the popper spilling fresh kernels into a fragrant pile; the movie theater sold little paper bags filled to overflowing; my mother made it just about every night after dinner. She used  a pressure cooker with just a little oil and constant shaking over the gas flame. Later she got a wire popcorn basket on a long handle as a gift. Even with practice, much of the popped kernels came out burned. Then she got a machine with a wire that turned on the bottom to keep the popped kernels from burning. She used that for years even as it lost its gleam with age.

Sarah’s boys beg for popcorn. She makes it in an “air popper” that uses a hot air blower akin to a hair dryer to pop the kernels. She fills up a big metal bowl and then tosses the hot popcorn with melted butter, salt, and finely grated fresh Parmesan. Who wouldn’t one beg for that?

René makes popcorn for her girls on Friday evening to enjoy while watching a movie. She sprinkles nutritional yeast to her version, reflecting her enthusiasm for a healthy diet.

Carol’s household has been limiting their popcorn because of a vey long spell of braces for teenagers. Now that braces have come off, popcorn popping has returned to the culinary repertoire.

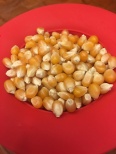
As for me, I rely on the microwave. I was surprised to learn from Wikipedia that prepackaged microwave popcorn is the most popular way to make the treat at home. The main drawback to that method is that it is relatively expensive. Being a tightwad, I buy two-pound bags of loose kernels. Our family prefers yellow over white – the popped kernels are bigger. For years I have used a popping method I learned about by watching Elton Brown’s “Good Eats” many years ago.  I place 1/3 cup of kernels in a brown paper lunch bag, close the bag with two folds, staple the fold with two staples at least 3 inches apart (to avoid arcing in the microwave) and microwave. I set the microwave timer for 3 minutes but pull the bag out of the oven when the sound of popping slows. That usually occurs at about 2 minutes and 30 seconds, but you need to experiment with your own microwave as they are extremely variable in the power they produce. When the corn is popped, I pull it out of the microwave, cut off the top of the bag with scissors, and dump the popped corn into a bowl for melted butter and salt.

I thought I had the perfect system. So I was surprised when I opened a Christmas gift from Susan. It was an Ecolution Micro-Pop® Popcorn Popper. Essentially it dresses up Elton Brown’s idea with an attractive glass bowl housed in a bright red plastic carrier and topped with a red lid that doubles as a dispenser for butter. It makes less popcorn than the brown paper bag method, but it is plenty for one person and it is easy to make a second or third batch. Time in the microwave is about the same, but you need to listen and stop the popping just the same  as with the paper bag. I was tempted to use more corn kernels – actually I did – and I strongly advise against it as the popped corn will burn and it will be hard to get it out of the popper. All in all it’s a good and fun method to pop corn. Still, I plan to hold onto my paper bags.

One last comment: Recently we spent a few days in Avalon on Catalina Island. One of our restaurant choices was the Avalon Grille (excellent choice, by the way) where they brought us a basket of delicately chili-flavored popcorn to go with drinks. The taste was light and refreshing, not at all what you might think when you hear “chili-flavored popcorn.” At home, I tried to reproduce the flavor. I mixed equal parts of table salt, vinegar powder (available from Pendery’s Spices) and ground chiles (You can use as mild or piquant as you wish.) Then I used the mixture to season popcorn that had already been buttered. My version was not as good as the original, but it was still good enough to do again.

6 Comments

Filed under Food, Photography, Recipes

RENAISSANCE LASAGNE

My daughter-in-law is a techie who lives in Silicon Valley. She is a very good cook and she is also a minimalist so she eschews cookbooks. For her, the internet is a perfect source. On the other hand, my daughter Carol loves cookbooks. She has shelves of them in her kitchen, and there is usually at least one tucked in her bedside book stack. For her, reading a cookbook beats reading a romance novel.

It was Carol’s turn to make the main course for our usual Sunday family meal, and the planets came together. Carol was on a diet in which vegetables are encouraged, meat and poultry are essential, and dairy products should be avoided. She found a dish that fit her requirements in a book she was reading, The Splendid Table’s How to Eat Weekends: Renaissance Lasagne. In addition, our granddaughter – the only person in the family who does not like lasagna (Whoever heard of that?) – was away at college. It was the perfect time to give the recipe a try. The recipe originally came from the radio show on NPR, “The Splendid Table.” I don’t know if the authors were touting it as an authentic recipe from the Renaissance. I have my doubts, because most recipes that I have read from the era say things like, “Take a knob of butter and mix with a handful of nuts not too freshly harvested and muddle with a dipper of milk.” This recipe is far too specific for that. I think the point is supposed to be that noodles approximating modern lasagne have been around since Roman times, and tomatoes did not reach the table until well after their transport from the New World after 1492.  This recipe has no tomatoes but is rich with chicken along with raisins and pine nuts. With a store list like that, it is clear that even if the recipe is absolutely authentic, this lasagna was almost certainly served only in the ducal palace or at the table of a wealthy merchant.

Carol’s menu was drawn straight from the cookbook. After our traditional half hour or so for drinks, light snacks and conversation about the events of the week, she served us what is titled in the book as “An Unusual Italian Salad”. It is based on frisée lettuce with curls of Parmigiano-Reggiano, candied lemon peel, toasted pine nuts, a vinaigrette and balsamic syrup. 

Then came the main dish accompanied with crisp-crusted Italian bread: Renaissance Lasagne.  The cookbook describes it as “…the long-lost wayward sister of the lasagne you have known and loved…straight out of Italy’s culinary golden age, the Renaissance.”  The delicacy and thinness of homemade pasta is an important part of the dish, but you can substitute store-bought, especially if you are in a hurry. Then you layer the pasta with “a light chicken ragù and sprinklings of nuts, raisins, spices, and cheese.”

I will not include the recipes for either the salad or the lasagne as they are readily available in the book, on the internet, or on Pinterest. Trust me, the meal was delicious, and the recipes are worth adding to your collection.

Lasagna lagniappe: lasagna or lasagne?

In Italian, one noodle = lasagna; two or more noodles = lasagne. In the USA, the convention is that the dish is spelled lasagna while in other English-speaking countries, i.e. the UK, Australia, etc., the dish is spelled lasagne.  (Think favorite/favourite) Even though the Splendid Table hails from the USA, they have chosen to spell the dish lasagne. Either way – or both – lasagna/e is one of my favorite foods. PPS: The automatic spell check in this software is driving me crazy. It keeps changing “e” to “a” when I am not looking.


6 Comments

Filed under Food, Photography, Recipes

THE HUNT FOR KIMCHI

One Christmas gift from my spouse was a kimchi pot. It seems as though I have been fermenting things my whole life. When I was a young boy, I helped my grandmother (from a German farm family in North Dakota) shred bushels of cabbage every fall. We used a wooden slicer with a guillotine-like blade – a rustic mandoline – to shred the cabbage before salting it and placing it in very large pottery crocks lined up along the wall of an outbuilding in her back yard. The crocks were filled to the brim with cabbage, salt, and water. Then we placed a cracked dinner plate on top of each crock and weighed them down with a brick or big rock. It then became my responsibility to check the crocks each day to replenish the liquid if needed. There must have been at least a dozen crocks, and the smell of fermenting cabbage soon became overwhelming in the building, even seeping out into the backyard. For a child, the process seemed interminable although it was probably only a couple of weeks. In any event, when my grandmother decided that the process was complete, it was time to fire up the canning equipment and activate the canning crew of women and children in the family. Steam rose from several big pots on the stove as jars were sterilized, filled and processed; sweat poured from the ladies who seemed happy enough. The end product of all this effort was rows of gleaming jars filled with sauerkraut. They would get stored in the scary basement and serve the family through the winter. At least once a week the evening meal consisted of a mound of sauerkraut, mashed potatoes with no butter, and a sausage (My recollection is that it was actually a hot dog.) That menu is one I resist to this day.

Those memories inspired me to try my hand at sauerkraut making when we lived in Louisiana. I found a small crock at a potters’ in Marshal, Texas. I shredded the cabbage on a wooden shredder we had found in an “antique store” – read junk shop – in some small East Texas town. I set up my fermentation lab in a hallway between the kitchen and dining room that we had dubbed the butler’s pantry. The smell of fermenting cabbage hung in the air of the butler’s pantry.  Our children, some of them teenagers, thought that Old Dad had gone off the deep end, and they were very amused. They loved to bring their friends to inspect the crock and inhale the fragrance. The visits always ended in gales of laughter.

In Santa Fe, Susan gave me a beautiful German crock to rekindle my interest in fermentation. I have written about the sauerkraut that I made with that crock. All of the family enjoyed Reuben sandwiches made with the sauerkraut. Unfortunately, the lid of the crock was broken in our move to California. We patched it together, and we tried to buy a new one, but apparently the German manufacturer has stopped importing to the United States.  The other problem was that the crock made  a LOT of sauerkraut.

Since our move to Southern California, we have had the opportunity to eat many varieties of Asian food. Korean restaurants are especially common nearby, and there are many families of Korean background who live in our neighborhood. We have become fans of kimchi. Susan apparently thought it was time to make another effort on fermentation, so she gave me a smaller glass container specially designed so that it is automatically vented and you don’t have to worry about maintaining a water seal. Of course, you can make sauerkraut or giardiniera, but my first effort seemed like it should be kimchi. I assumed that finding the ingredients should be no problem at our local supermarket, and I headed there with shopping list in hand:

Napa cabbage. Check

Daikon radish. Check

Daikon radish

Carrots. Check

Ginger. Check

Ginger

Scallions. Check

Fish sauce. I went to the aisle labelled “Asian/Hispanic”. The only fish sauce was from Thailand!?

Rice flour. I already had some in the pantry and then U decided not to make the slurry for kimchi paste

Korean chili pepper. I looked through the shelves several times, and all I could find was Gochugang spicy miso sauce.

I totally struck out on salted, fermented shrimp so Carol drove me to the Korean market down the hill. We showed an iPhone image of what we were looking for to two young men who were stocking shelves. They averred that they had never heard of it and they didn’t have it. With persistence, Carol found a jar labelled “shrimp sauce (finely ground), Product of China” which we bought.

Having assembled all of the ingredients, I began to make my first kimchi even though I am certain that our Korean neighbors would cringe at labeling the stuff as such.  The first order of business was to cut the Daikon radish and carrots into 3 inch match sticks. For that I used a French mandoline that sits unused in its box even though it is a beautiful machine to behold.  Then the real production of kimchi began. After sitting in the jar on my desk for four days with little odor,  the kimchi was ready. I transferred it to Mason jars to be refrigerated. I also ate a good portion. If I do say, it turned out to be pretty delicious.

RECIPE

Basic Kimchi

Ingredients

  • 1  medium head napa cabbage
  • water
  • ½ cup salt
  • 2 cups Daikon radish peeled and cut into 3 inch julienne
  • 2 carrots, peeled and cut into 3 inch julienne
  • 1 medium onion, chopped
  • 6 scallions, roots removed and cut into 1 inch pieces
  • 1/3 cup spicy miso sauce
  • ¼ cup fish sauce
  • ¼ ginger, peeled and minced
  • 4 cloves garlic, minced
  • 2 teaspoons salted, fermented shrimp sauce
  • 1½ teaspoons sugar

Method

  1. Cut the cabbage in half, lengthwise. Cut crosswise in 2 inch pieces, discarding the core. Sprinkle the cut cabbage with salt and then place in a large bowl. Cover with water, cover with plastic wrap and set aside for 4 hours.
  2. After the cabbage has soaked,  drain in a colander and rinse to remove salt, and return to the bowl.
  3. Add all the remaining ingredients and mix well. Transfer to the fermentation crock. Seal the crock with the venting lid. Place the crock in a cool place, undisturbed, for 4 days. Then bottle or eat the finished kimchi. Bottles may be refrigerated for up to a month.


9 Comments

Filed under Food, Photography, Recipes

TETE DE MOINE

A girolle has been on my want list since I first saw one in an excellent cheese shop in Santa Fe. The device is beautifully crafted of polished wood and gleaming stainless steel. The girolle was invented by Nicolas Croiviser in 1982 for one purpose: to shave a unique cheese into flower-shaped curls. The device is an extravagance but it is clearly a must-have for a kitchen gadgeteer who already has a croquembouche mold, a sausage stuffer, and a Swedish sardine grilling basket. Recently we visited a new cheese shop, The Cultured Slice, on Pacific Coast Highway in Hermosa Beach. There was a good cheese selection, and the cheesemonger was very friendly and helpful. But what caught my eye was a brand new, shiny girolle. I yielded to temptation and bought it.

Girolle

The next purchase, of course, was the cheese, tête de moine (monk’s head). Although they had one at Cultured Slice, I asked Sarah to order one from their cheese purveyor for our visit to the Bay Area. Expect to pay around $60 for a round cheese of about 2 pounds. That amount of cheese will likely serve at more than one gathering.


Last night was our big event. We planned to enjoy cheese curls before our dinner. First was the unveiling of the cheese. We admired the beautiful silvery foil wrapping and the seal on the top with an image of monks making cheese. The cheese itself was a perfect cylinder with a textured rust-colored rind. We cut off the top to reveal a smooth, sunshine-yellow paste that gave off an earthy fragrance that was much more subtle than I had come to expect from descriptions on the internet. Continue reading

10 Comments

Filed under Food, Photography

PERSIMMON NEGRONI

Autumn is edging into winter. You can feel it in the air, and in some parts of the country like our old home in Santa Fe, they have had snow with snowflakes filling the air. Tragically in California there are no snowflakes, only smoke and ashes. San Francisco is darkened by smoke from the Camp Fire, and in Los Angeles the air is heavy with the smoke and smell of the Woolsey Fire. One night this week, Carol was in Redondo Beach and captured the image of the fires over Malibu, 26 miles away. Our thoughts are with the victims. Newspaper reports have been filled with horrible images and frightening stories. I hope the fires are soon brought under control. We need rain.

This week, family Sunday dinner was at Carol’s house. Carol outdid herself. She enjoys cooking and finds it therapeutic. She needed to find some relaxation. She also found a bounty at the farmers market. Just about everything on the menu – except the rabbit – came from the vendors there.

First course was a delicious mushroom soup that she loves to serve in small glass bowls made for sipping. The soup is beautifully seasoned with herbs and an excellent replacement for the usual appetizers. Second course was a simple salad of blood oranges, navel oranges, avocados, and sprouts topped with a tangy vinaigrette. Of course, the highlight of the meal was a dish that Carol called rabbit cacciatore: pieces of perfectly cooked rabbit (The young butcher who sold Carol the rabbit had to ask for help from an older man in cutting up the rabbit.) and noodles with a light sauce and topped with fresh tomatoes and parsley.  Finally, though we didn’t need it, was a dessert of canelés from the bakery vendor at the farmers market topped with a sauce of figs that I had admired at the market that morning.

Besides the change in the weather, there is another way to tell that winter is coming. Persimmons make their appearance. And they are plentiful at the farmers market. Problem is they are not fully ripened and you need to take them home to ripen on the counter for days or even weeks. There are native varieties that are especially common in the South. They don’t make it to the farmers market but they are treasured by those who know about them. There are two varieties at our local market: the Hachiya and the Fuyu. The Hachiya is shaped like an acorn and is astringent (i.e. it will make you pucker) until it is fully ripe. Then it becomes very soft and sweet. The Fuyu is shaped like a tomato and is not astringent. It is firmer even when ripe. Yoo can “ripen” persimmons by putting them in the freezer overnight. This reflects Susan’s father’s adage that persimmons on our farm shouldn’t be eaten until after the first frost.

Because of the abundance of persimmons, our son-in-law decided to make persimmon Negronis for our traditional cocktail hour. He and Carol had earlier planned to make the recipes in Sarah and Evan’s new cookbook, Rich Table. In the book, the drinks look especially good and most easily accessible by the home cook. The recipe for Persimmon Negroni calls for Hachiya persimmons; we only had Fuyu.  We also did not have available the various gins recommended so SIL just went with Hendricks. Honestly, I couldn’t tell the difference. But I could tell my drink was delicious.

RECIPE

Persimmon Negroni

Persimmon Negroni

Ingredients

  • 1 very ripe Hachiya persimmon
  • 1 ounce Campari
  • 1 ounce gin*
  • ¼ ounce (1½ teaspoon) lemon juice
  • ¼ ounce (1½ teaspoon) simple syrup
  • ice

Method

  1. Press the persimmon through a fine-mesh strainer into a small bowl. Discard the solids.
  2. In a cocktail shaker, combine 1 ounce of the persimmon puree with the Campari, gin, lemon juice,, simple syrup and ice.
  3. Shake until the ingredients are well chilled (about 30 seconds)
  4. Strain through a fine-mesh strainer into a rocks glass containing one large ice cube.
  5. Serve immediately.

*The original recipe calls for ¾ ounce London dry gin and ¼ ounce of herbaceous gin. If you don’t have a large commercial bar stock at your disposal, use your favorite gin, Hendricks provides a nice herbaceous element.


5 Comments

Filed under Food, Photography, Recipes